Introduction
This will take you through the steps required to set up and deploy a very simple Serverless application on AWS. This assumes you have some familiarity with AWS and its command line interface. For more information see the AWS CLI docs
Prerequisites
Please make sure you have an AWS account, have aws-cli installed and at least node version 6.
You can check this by running node --version && aws --version from a command line
Installation
Step 1 - Serverless installation
Install the Serverless framework on your machine via npm by running this command:
npm install serverless -g
We have used a global install here for convenience however ideally you would use a local install for a real project so that the version of the Serverless framework remains consistent for that particular project.
Step 2 - Create project
Create a simple hello-world project using a template built into the Serverless command line tool.
mkdir first-serverless
cd first-serverless
serverless create --template hello-world
This will create you two files.
serverless.yml- this is used to configure lambda endpoints and/or events for lambdas invocation. Most of the configuration is done there. The list of available properties and settings can be found in the Serverless documentation.
# Welcome to serverless. Read the docs
# https://serverless.com/framework/docs/

# Serverless.yml is the configuration the CLI
# uses to deploy your code to your provider of choice

# The `service` block is the name of the service
service: serverless-hello-world

# The `provider` block defines where your service will be deployed
provider:
  name: aws
  runtime: nodejs6.10

# The `functions` block defines what code to deploy
functions:
  helloWorld:
    handler: handler.helloWorld
    # The `events` block defines how to trigger the handler.helloWorld code
    events:
      - http:
          path: hello-world
          method: get
          cors: true
handlers.js- this contains the hello-world endpoint.
'use strict';

module.exports.helloWorld = (event, context, callback) => {
  const response = {
    statusCode: 200,
    headers: {
      'Access-Control-Allow-Origin': '*', // Required for CORS support to work
    },
    body: JSON.stringify({
      message: 'Go Serverless v1.0! Your function executed successfully!',
      input: event,
    }),
  };

  callback(null, response);
};
Step 3 - Create AWS credentials
If you have not used aws-cli before you will need to create credentials for it so that the serverless framework is able to connect to your AWS environment. Detailed instructions on how to do this is available from the Serverless website.
Once you have done that you will need to allow your AWS user permissions to deploy a Serverless application.
-
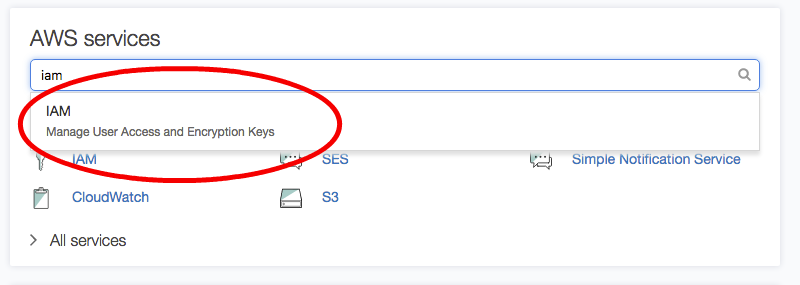
In the AWS console go to the IAM service -> Users -> IAM Manage User Access and Encryption Keys
-
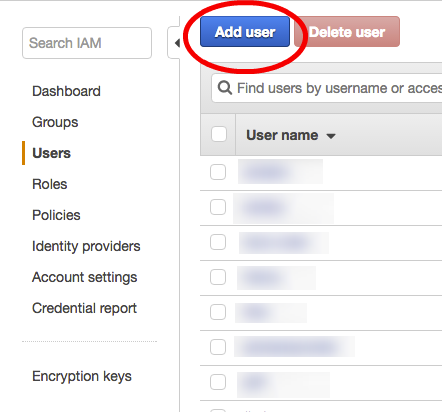
Choose your existing user or create a new user.
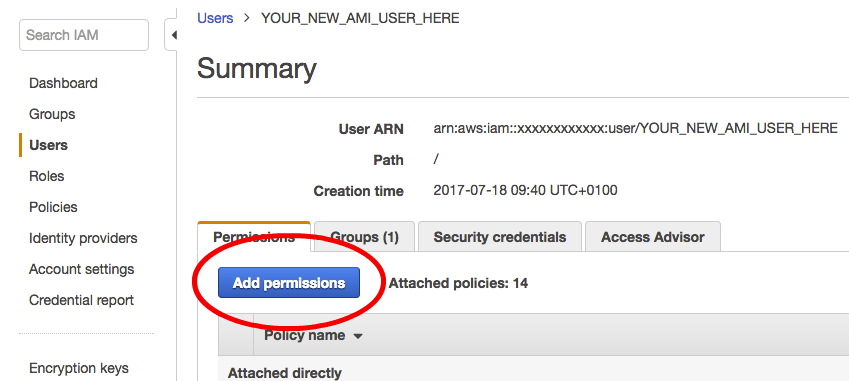
Ensure the user has the following permissions:
AWSLambdaExecuteAWSLambdaRoleAWSLambdaFullAccessAWSLambdaRoleAWSCloudFormationReadOnlyAccess
(You can open up more permissions but remember it is best practice to grant least privilege principle)
-
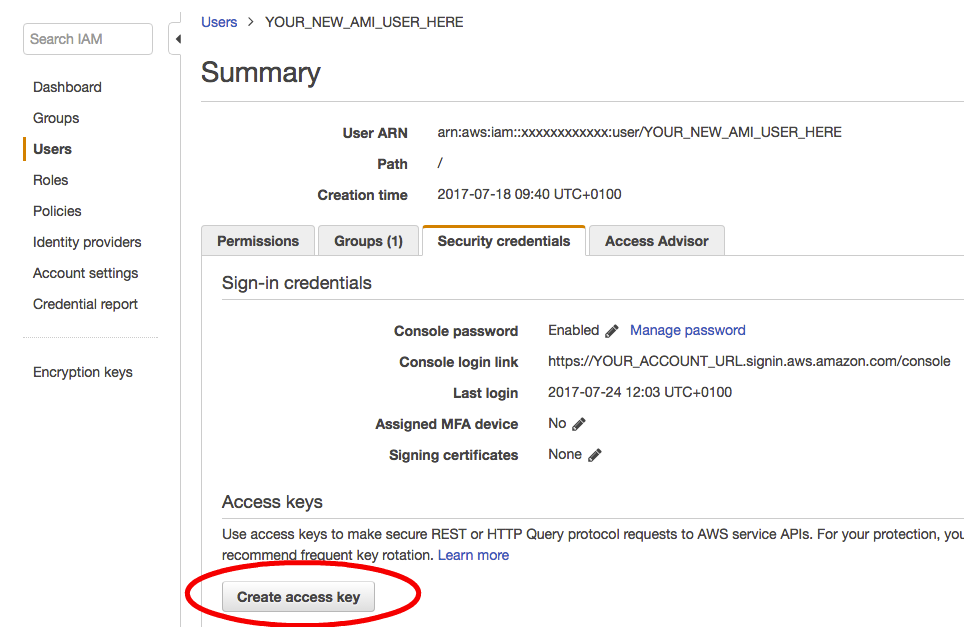
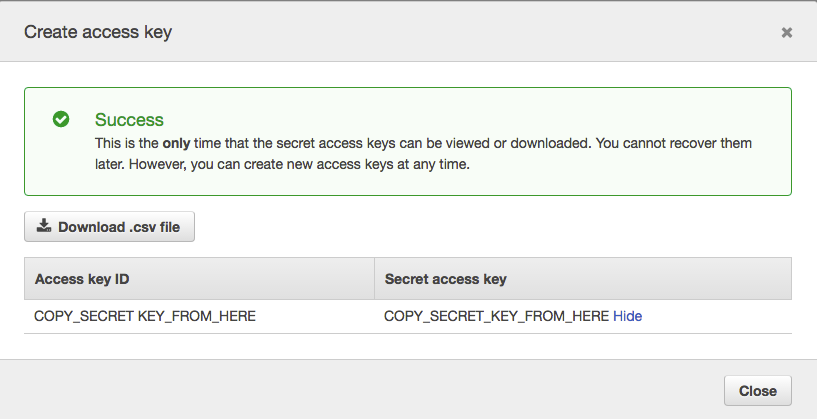
Generate new Access Key for the user in Security Credentials.
-
Save the credentials somewhere safe.
Step 4 - Configure serverless with your AWS credentials
Now you can use Serverless Framework to save the credentials in a way that the aws-cli can understand them by running the following command.
serverless config credentials --provider aws --key YOUR_ACCESS_KEY --secret YOUR_ACCESS_SECRET
Step 5 - Deploy your lambda function
Deploy your Lambda function to AWS using the following command. (the --verbose flag will output full logs of your deployment)
serverless deploy --verbose
As you may be able to see in the output this creates quite a few AWS resources. Behind the scenes it creates a code bundle and new CloudFormation stack that does the following:
- Uploads your code to S3.
- Creates a lambda function from your code
- Creates an API gateway api and endpoint that points to your new function.
- Creates a CloudWatch log group for your function
You can view the files uploaded to s3 in the .serverless folder that the deploy command creates.
For more detail see the explanation from Serverless here
Try it out
The output from the above deployment command will print the endpoint API Gateway of the deployed function similar to the example below. Just open it in a browser to test the Lambda function works.
endpoints:
  GET - https://qewroweire.execute-api.us-east-1.amazonaws.com/dev/hello-world
For more information on API gateway urls see this page on how to find out what yours is after deployment.
What now
Check out some of the links below to learn more and get building your apps with serverless now.
Further reading: